Nowadays fishing and boating are very popular. People love to ride the boat for doing many fun stuff. If you are a fisherman and love to fish by using boat then you may familiar with trolling motor. They are popular for their excellent features. They are adjustable and offer maneuverability to the boat ride.

Describing trolling motor is not part of this article, you have to connect the motor with your battery to use them. But most of the people don’t know how to connect the wire to the battery so that they can use the motor on their boat. In this article, we have discussed how to connect trolling motor to the battery. Just follow these steps that are mentioned below to connect the motor to the battery.
Connecting a trolling motor to a battery may seem like a daunting task, but with a little knowledge and the right tools, it can be a simple DIY project. In this article, we’ll guide you through the process step by step, ensuring that you can safely and effectively connect your trolling motor to your battery.
Types of Trolling Motors
Before we dive into the connection process, it’s essential to understand the different types of trolling motors available:
Bow Mount
Bow mount trolling motors are installed on the front of the boat and provide excellent control, particularly for boats with larger hulls.
Transom Mount
Transom mount trolling motors are attached to the rear of the boat and are more suitable for smaller boats and kayaks.
Engine Mount
Engine mount trolling motors are installed on the boat’s outboard engine and utilize the steering system for maneuvering.
Types of Batteries
Next, let’s discuss the different types of batteries that can be used with trolling motors:
Wet-Cell Lead Acid
These batteries are the most common and least expensive option. They require regular maintenance and have a shorter lifespan than other types.
AGM (Absorbent Glass Mat)
AGM batteries are maintenance-free and have a longer lifespan than wet-cell batteries. They’re more expensive but provide better performance and durability.
Lithium
Lithium batteries are lightweight, maintenance-free, and have the longest lifespan. They’re also the most expensive option.
Connect Trolling Motor to Battery
Gather Necessary Tools
Before starting, ensure you have the following tools and materials:
- Appropriate battery for your trolling motor
- Battery connectors or terminals
- Wrenches
- Wire cutters/strippers
- Heat shrink tubing and a heat gun (optional)
- Battery Selection
Choose the appropriate battery based on your trolling motor’s voltage requirements and the amount of runtime you need. Most trolling motors require either a 12V, 24V, or 36V battery system.
Wiring Connections
- Ensure the trolling motor is switched off and disconnected from any power source.
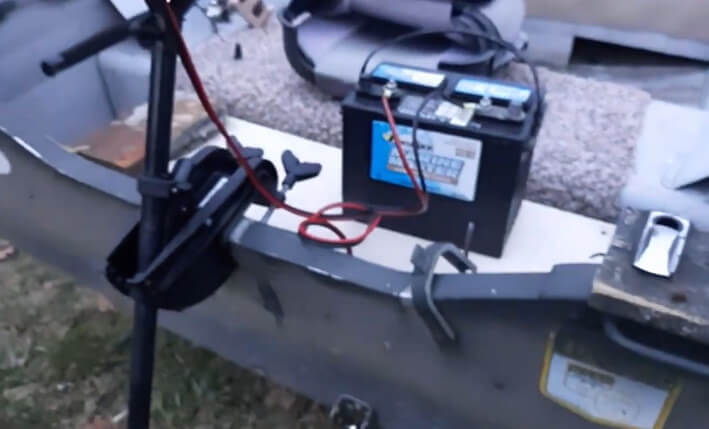
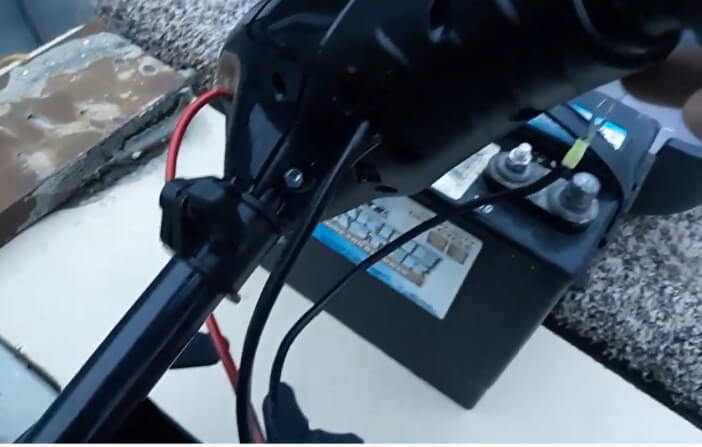
- Connect the red (+) wire from the trolling motor to the positive terminal on the battery.
- Connect the black (-) wire from the trolling motor to the negative terminal on the battery.
If you’re using a 24V or 36V system, connect additional batteries in series by connecting the positive terminal of one battery to the negative terminal of the next.
Circuit Breaker Protection
To protect your trolling motor and battery, install an inline circuit breaker near the battery connection. The circuit breaker rating should match your trolling motor’s recommended amperage.
Proper Battery Maintenance
To prolong the life of your battery and ensure optimal performance, follow these maintenance tips:
- Keep the battery clean and free of dirt and debris.
- Regularly check the connections and tighten if necessary.
- Keep wet-cell batteries topped up with distilled water.
- Charge the battery after each use to prevent sulfation.
- Store the battery in a cool, dry place when not in use.
Now that you understand the basics, let’s move on to the actual connection process:
Step One
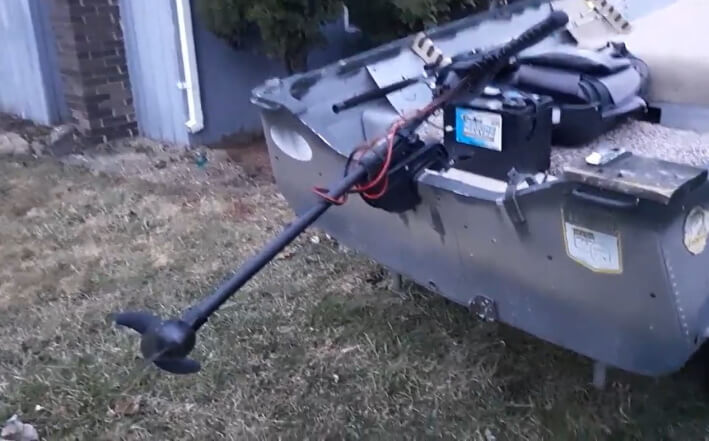
Connecting a 12-volt motor to the 12-volt battery is not hard. At first, you have to tie the black (negative) lead from the trolling motor to the negative terminal of the battery. Keep in mind that you have to use a 50-am circuit breaker in this connection. Secondly, connect the red lead from the trolling motor to the positive terminal of the battery. This is very easy, just read this carefully and practice 2 or 3 times to learn it deeply.

Step 2
To connect the 24-volt trolling motor, use two 12-volt battery. Connecting 24-volt trolling motor is a little bit complicated from the 12-volt motor. We are marking the batteries as “First” and “Second” So that you can understand more easily. Take the black (negative) lead from the motor and connect it to the negative terminal of the first battery.
Then connect the red (positive) lead from the trolling motor to the positive battery terminal of the second battery. You have to use a 40-amp circuit breaker on this (positive) connection. Now you have to connect a jumper wire to the positive terminal (first battery) and to the negative terminal of the second battery. If you can do these successfully then you are all set on connecting 24-volt trolling motor to the battery.
Step 3

In this step, we will discuss the method of connecting 36-volt trolling motor. As there are 3 batteries in this connection, we are marking them as “First”, “Second” and “Third”. First, tie the black (negative) lead of the trolling motor to the negative terminal of the first battery. At the second step, fasten the red(positive) lead of the trolling motor to the positive terminal of the third battery.
Use 40-amp circuit breaker on this(positive) connection. Now simply connect a jumper to the positive terminal of the first battery and connect it to second’s battery’s negative terminal. Then connect another jumper from second’s battery’s positive terminal to the third’s battery’s negative terminal. That’s all, you have successfully connected a 36-volts trolling motor.
Do I Need A Circuit Breaker Between My Trolling Motor And Battery?

When connecting the trolling motor to the battery, you have to also consider a circuit breaker or fuse to protect against short and fire dangers. Of course, either a circuit breaker or a fuse is noteworthy to keep your motor stressed-free.
Its main purpose is to conserve the wire, not whole devices. It is very easy to install. You can settle the fuse manually between the trolling motor and battery, especially as close to the battery as possible. After installing the fuse and connecting the trolling motor, you can start your fishing activity. At the time of water, it is also possible to charge a boat battery without any risk. Believe it or not, you can use two marine batteries in a boat.
Remember that the fuse or circuit breaker is not able to keep safe your high dangerous trolling motor short. Because that motor has already weakened. And, you should always save your trolling motor battery from metal objects that can fall onto it.
Troubleshooting Tips
If your trolling motor isn’t working correctly, try these troubleshooting tips:
- Check for loose or corroded connections.
- Ensure the battery is fully charged.
- Test the battery with a multimeter to ensure it’s providing the correct voltage.
- Inspect the trolling motor for any signs of damage or wear.
- Consult the manufacturer’s manual for specific troubleshooting advice.
Conclusion
Connecting a trolling motor to a battery is a straightforward process when you have the right knowledge and tools. By following this guide, you can safely and effectively connect your trolling motor and enjoy your time on the water. Remember to maintain your battery and troubleshoot any issues to ensure optimal performance and a long battery life.
We hope that you have got a complete idea about connecting trolling motor to the battery by reading this article. Repeating one thing again: Put all the power switches to “Off” position before connecting the motor to the battery.
Can I Use a Motor Guide Trolling Motor for Quick Battery Solutions?
Yes, you can use a Motor Guide Trolling Motor for quick battery solutions. By following some simple trolling motor installation tips, you can ensure that your motor is properly connected and running efficiently, providing you with a reliable and convenient power source for your boat.
FAQs
Can I use a car battery for my trolling motor?
While it’s possible to use a car battery, it’s not recommended. Trolling motor batteries are specifically designed for deep-cycle use, which means they can handle repeated discharging and recharging.
How long will my trolling motor battery last?
The runtime of your battery depends on the type of battery, its capacity, and the power consumption of your trolling motor. Generally, a fully charged battery should last between 2-8 hours, depending on usage.
How can I increase the runtime of my trolling motor?
To increase the runtime, consider using a larger capacity battery or switching to a more efficient battery type, such as an AGM or lithium battery.
How do I know when it’s time to replace my trolling motor battery?
If you notice a significant decrease in runtime, difficulty holding a charge, or swelling of the battery case, it’s likely time to replace your battery.
Can I use a solar panel to charge my trolling motor battery?
Yes, you can use a solar panel to charge your battery. Ensure the solar panel is compatible with your battery type and has a suitable charge controller to prevent overcharging.
About This Writer

Hi, I am responsible for the 'Homeowners Power Solutions' category. My name is Liam Jaxon and a licensed technician with 7 years of experience in vehicle batteries, electrical gadgets, and home appliances. My working experience in different residential & light commercial electrical sectors and the automobile industry helped to acquire vast knowledge in this industry.