Nail and hammer are widespread frequently used tools particularly during implementing house renovation or similar kind of projects. Nails are drived in the workpiece with the hammer or other tools including nail guns. During home improvement project sometimes you may face a situation when you need to pull out the sunken nails.
Though removing nail is not that much difficult job, but as it deals with your precious wood materials, it may damage your piece if proper techniques are not followed to prevent such incidence.

You may even sometimes find an extremely stubborn nails deeply buried into your materials which sometimes needs couple of ways to remove.
There are some smart techniques that you need to know while dealing with removing sunken nails from wood efficiently protecting your wood to be in original state.
Therefore, I have designed my article to discuss how to remove sunken nails from wood so that you can get familiar with the rights techniques and apply them while dealing with nail removal tasks.
Techniques to Remove Sunken Nails From Wood
As I said, removing nails involves some basic aspects which you need to be acquainted with to protect your workpiece from damage. There are standard nail remover tools and accessories available in the market and each of them has different functions to efficiently deal with the removing task. Besides, a few more technical aspects you need to care for during and post nail removal tasks.
Claw hammer, pry bar, cat’s paw, reciprocating saw and few others are the common tools the woodworkers use to remove nails. Each of the tools is used to tackle different situations in the event of buried nails. Sometimes part of the nails may need to be cut partially that protrude from the materials to resolve the issue.
You have to carefully review the situation and then choose the removal options so that it would give you the best result.
Safety First!
Maintain safety protocol while dealing with nail removal tasks to avoid accidents and workplace hazards. Wear all PPE like goggles, standard gloves and boots, etc. to be protected from injury.
Get a block to use during nail removing tasks. Place the block under the tools to have enough leverage for proper positioning of your nail removing tools and achieving efficient removal tasks.
Remove Nail With a Hammer
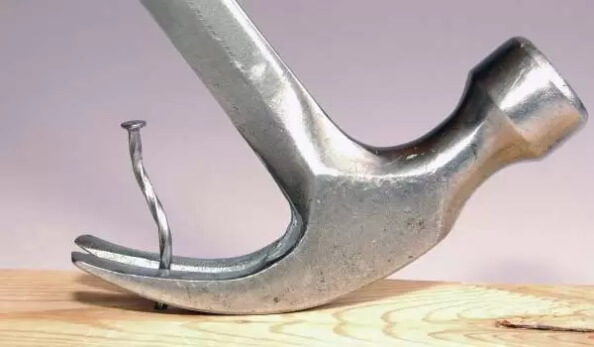
Hammer may not be a good choice to remove a nail, but it won’t be a bad option when there is no other better tool at your hand to pull out the sunken nails. However, you need a claw hammer.
Process to Follow:
- First identify the nails you want to remove.
- Take your hammer and position it to the head of the nail. Then start prying gradually and repeat it until the head of the nail appears on the wood surface.
- Then get a tight hold on the nail’s head and make a sideway with a slight pressure. Don’t put too much pressure to avoid damage to your wood piece. Repeat it until the nails are pulled out completely.
The above method may not work in case of deeply buried nails. In that case, there are some other effective methods that will be discussed later.
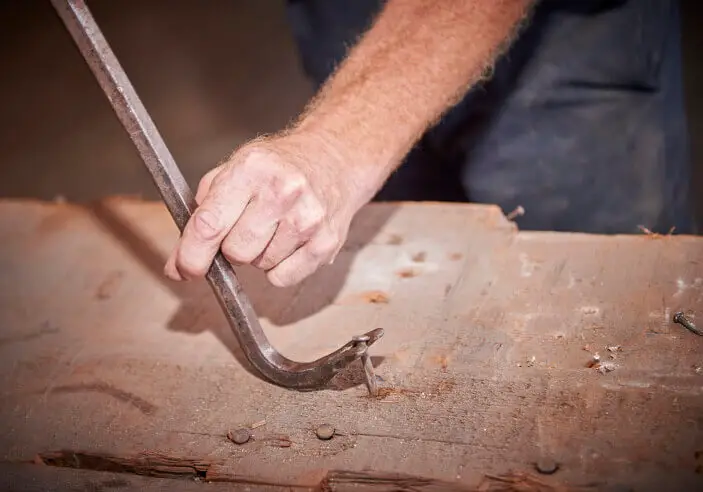
Remove Nails With Cat’s Paw Pry Bar
In case of using a pry bar, you don’t need a block or any other support. However, a pry bar is a risky tool which can even permanently damage your wood surface. However, pry bars actually are a brilliant nail removing tool for removing bent and galvanized nails which a hammer can’t do.
Process to Follow:
- Get your cat’s paw pry bar and position it as closer as possible at the end point to the nail which will be removed. Then pick your hammer and use that to push the pry bar into the wood.
- Then simply pull out the nails with the pry bar as long as you need it to finish your task.
Remove Headless Nails
Removing headless nails need different techniques to apply. The above methods discussed earlier with claw hammer or Cat’s paw pry bar won’t work in this case. So let’s see how you can remove the headless nails of the wood surface.
To tackle this problem, a pair of needle-nose pliers and diagonal-cutting pliers would be a good option. As the nail is headless, you won’t find any area to grab the nail. Therefore, you can have a good grip over the nail with the pliers.

Process to Follow:
- Place your needle-nose pliers as near to the nail as possible and dig out a small amount of wood to make a path for the nail to be pulled out. After having the path, grasp the upper tip of the nail with the plier.
- Then start pulling the nail out of the wood. Keep your plier straight as much as possible while removing tasks taking place to avoid any obstruction in the middle of the task. To release the tight grip of the nail, you should slightly move the nail side to side so that the nail can have an easy path to come out.
- Continue this task until the segment of the nail is raised above the wood surface.
- When the headless nail gets exposed from material, you may replace it with the diagonal-cutting pliers. Don’t grab it onto the nail too strongly to avoid cutting the nail in the middle. Just grab on to the nail in a way so that the plier becomes able to move it around.
- At this stage, repeat the same motion you did with the needle-nose plier. Move the nail side by side until the portion of the nail is pulled out slowly. Again, don’t put too much pressure to prevent the cutting of the nail.
- Finally pull out the nail when most of the portion of it is removed.
Remove Nails Using Reciprocating Saw
- Reciprocating saw you may use to pull out the nails as it can cut with precision. This tool can reach the closest point of the nails into wood to pull it out. But the disadvantage is if you are not quite familiar with this tool, you better avoid this to prevent any damage on your wood piece.
- If you are ready to use a reciprocating saw, get a 10-teeth per inch blade. They are extraordinarily brilliant to cut through nails.
Remove Nails Using Nail Kickers
Nail kicker is one of the effective nail removing tools. Though the setting up is little consuming, it would give you the best service once you successfully have set it up. This tool will make the removing task quicker and smoother compared to other ones without damaging your workpiece. Let’s look at the process
Process to Follow:
- Prepare your wood from where nail is to be removed
- Place the nail kicker on the nail’s head and push it slightly through the wood surface
- Then the tool will automatically pull out the nail with its own capacity
- In case of unsuccessful, repeat the method until the entire nail is removed. Else, you can also prefer other methods to remove the nails depending on the situation.

Remove Nails With Nail Jack
Nail jack also could be a solution for nail removing tasks. It’s pretty handy tool to help in removing nails
Process to Follow:
- Place the nail jack in the correct position where the nail is buried.
- Drive the nail jack into the head of the nail and hold the head
- Then squeeze and amalgam it into the nail. The nail will smoothly come out.
Additional Tips
During nail removing jobs, you would notice some removing marks or holes left and sometimes they are too small to notice. But they may affect the appearance of the wood surface. Fill up the holes with some spackle and leave it for a few hours until the spackle dried off. Then sand them down and paint over to retrieve the original state of your workpiece.
Final Notes
I hope you have found this article beneficial while you have to deal with sunken nails to remove. It’s pretty simple but a little tricky as it might damage your wood piece if you won’t take extra care and apply recommended techniques to carry out buried nails removing jobs. If needed, consult with the experts while working with costly materials related to sunken nails removal.
Knowledge is power. Train yourself to work efficiently for the best results avoiding occupational hazards and accidents. Keep yourself updated with the latest information in the technology world to sustain your productivity and professionalism. If needed, consult with them to be guided properly.
Never ignore the safety protocol to maintain as it may cause injuries and fatalities.
Finally, I would expect you to share your comments and feedback on how it helped you and if you need further consultations. Please help us share this article and our sites with people you know so that we can offer our expert services to address the challenges people are facing in the power tool industry.
Read more:
- 5 Major Operations in Sharpening Hand Saws
- Can You Use a Tile Saw to Cut Wood: Yes or No, Why?
- Can You Nail PVC Trim?
About This Writer

Hi, I am Eric Devin and I am a professional interior architect. Since childhood, I've always enjoyed DIY projects! And, I have loved to solve simple household problems using essential tools and equipment. I have also acquired a lot of information about basic household tools settings by working with contractors.