If you don’t have a fence around your property, you’ve probably considered getting one.
When the weather is great, building fences is a lot of fun, but what about when it’s raining?
After all, a fence must be durable to resist the weather and keep out whatever you want to keep out. Does constructing it in the rain make it less likely?
Continue reading to discover.

Can You Install a Fence in the Rain?
It is possible to construct a fence in the rain. To obtain the greatest results, dig the post holes a few inches deeper than normal, backfill the bottom third of the holes with tamped gravel, and use dry mix concrete.
Rain, most people believe, will wet the earth, preventing you from properly setting up your post holes or weakening the concrete you want to use. This is only true in the case of continuous rain. Regular rain (and especially a light drizzle) will have no effect on the strength of your fence.
However, installing a barrier during a deluge that is expected to last many days would be a huge error. If you attempt, the concrete will have a terrible time setting, even if you use a fairly dry mix, and all of the post holes will fill with water, making your life unpleasant.
It’s worth remembering that you won’t be able to drill the holes to drain the water in such a violent rainstorm. Even if you could, the foundation would be too weak to support the fence in that amount of rain, and the concrete would be unable to keep the posts solidly in place.
Any other type of rain, on the other hand, will most likely result in the installation of a long-lasting fence.
Let’s look at how to build a fence in the rain now that you know you can accomplish it.
What Precautions Should Be Taken When Installing a Fence in the Rain?
1. Wear protective gear such as waterproof clothing, boots, and gloves.
2. Clear away any loose dirt and debris before beginning the installation.
3. Use a waterproof adhesive or sealant to ensure that the fence posts are properly sealed.
4. Use pressure-treated wood to prevent rotting in wet conditions.
5. Make sure that the posts are firmly anchored in the ground, using concrete or gravel.
6. Check the fence posts are level before attaching the panels.
7. Place a tarp over the work area to protect the materials from the rain.
8. Take extra care when handling power tools, as they may be slippery in the rain.
9. Check that all components are securely fastened before leaving the area. 10. Dispose of any excess material in a responsible manner.
Common Questions About Fence Installation in Rainy Weather
Is It Okay to Build a Fence in the Rain?
Yes, that is certainly feasible. The wet ground may be found in many meadows, parks, golf courses, and dwellings. Dig the holes 3-5 inches deeper in the damp earth to install it. After that, fill the holes with gravel. To efficiently install wood posts, use concrete and pressure-treated wood. Drainage requires sufficient depth and backfill.
Can You Build a Fence With Wet Wood?

Sure, there shouldn’t be any issues. If you wanted to, you could even work in the rain. (However, if you do, stay away from power tools.) Fresh pressure-treated timber is frequently damp and drippy.
How to Install Fence Posts in Wet Ground
Let’s get started with the installation. This may consume some of your time. However, we can tell you that the entire process will take far less time than retiling a shower. You just must exercise patience during the procedure.
Necessary Items
- Gravel
- Cement
- Shovel
- Pressure-treated wood
- Posthole digger
You can then proceed to the step-by-step instructions after organizing these things.
1st Step: Dig Holes
To begin, dig your holes with a posthole digger. The depth and width of each hole should be approximately 20 inches and 6 inches, respectively.
The hole should be a few inches below the frost line. As previously said, each hole should be 3-5 inches deeper.
Step 2: Gravel the Holes
Fill the holes you just dug with gravel using your trusty shovel. Make sure the bottom third of each hole is backfilled with tamped gravel. It will prevent water from seeping through the perforations.
Step 3: Mix the CONCRETE
It’s time to start mixing the concrete. Make a paste out of your concrete by mixing it with little water. For the correct amount, consult the manufacturer’s instructions. If you don’t have a guide, you can use the basic concrete preparation mix.
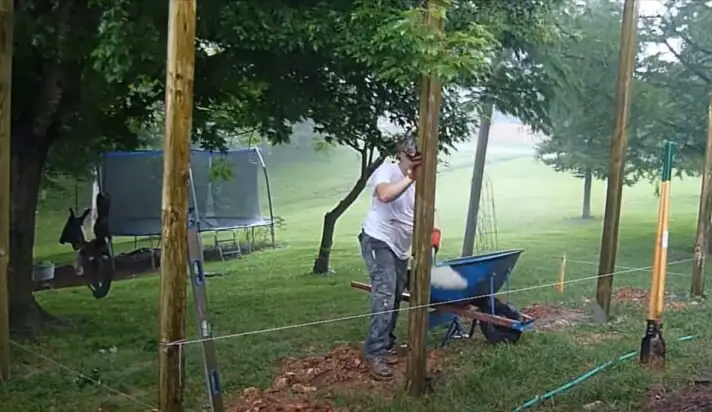
In a wheelbarrow, stir it around with a large shovel. Pour the concrete into each hole once it has been prepared.
Step 4: Secure the Holes
Now is the time to put your pressure-treated wood into the hole. Your concrete will finally be held in place. To secure it in the hole, apply whatever force is necessary.
The fence will become more solid as it is buried deeper in the pit. Repeat this process for each post hole you’ve excavated.

Step 5: Level and Balance the Posts
Finally, check that each post is level and balanced before the concrete hardens. Make sure each post is properly aligned with the others. If necessary, make any necessary modifications.
Pour extra concrete if necessary to guarantee that everything is flawless. After you’ve finished, wait for the concrete to solidify.
Don’t worry, it’ll only take a fraction of the time it takes for grout to set. You have only 24 hours to wait. Even if it rains, the concrete will be poured.
Can I Install My Fence in Bad Weather
Many people believe that installing a fence should be done in the spring or summer when the weather is usually pleasant. However, with the exception of the rain, fences may be built in almost any weather. Calcium chloride can be added to your concrete mixture in severely cold conditions (32 degrees and below).
Conclusion
That’s all we had to say about your fence posts being installed on soggy ground. With this, we’ll be parting ways.
It is better to avoid working on the post if there is a lot of water in the region or if it is raining heavily that day. Wait until the next day, when the earth has had time to dry and is not dripping wet, before attempting to reinstall the post.
We hope this clears things up for you. Until the next time, take care. Best of luck!
Read more:
About This Writer

Hi, I am Eric Devin and I am a professional interior architect. Since childhood, I've always enjoyed DIY projects! And, I have loved to solve simple household problems using essential tools and equipment. I have also acquired a lot of information about basic household tools settings by working with contractors.