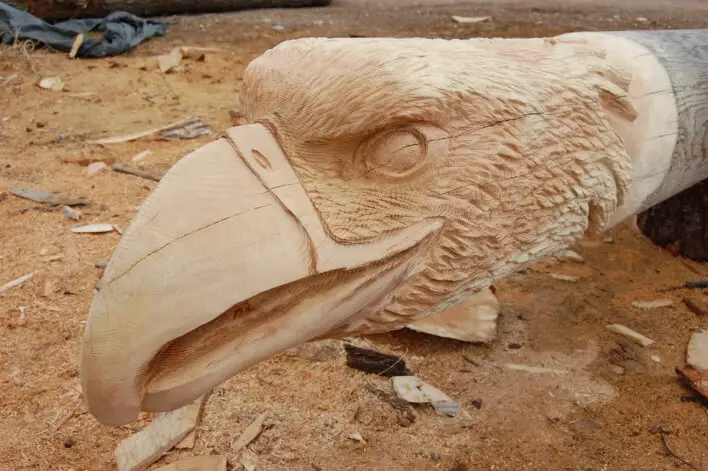
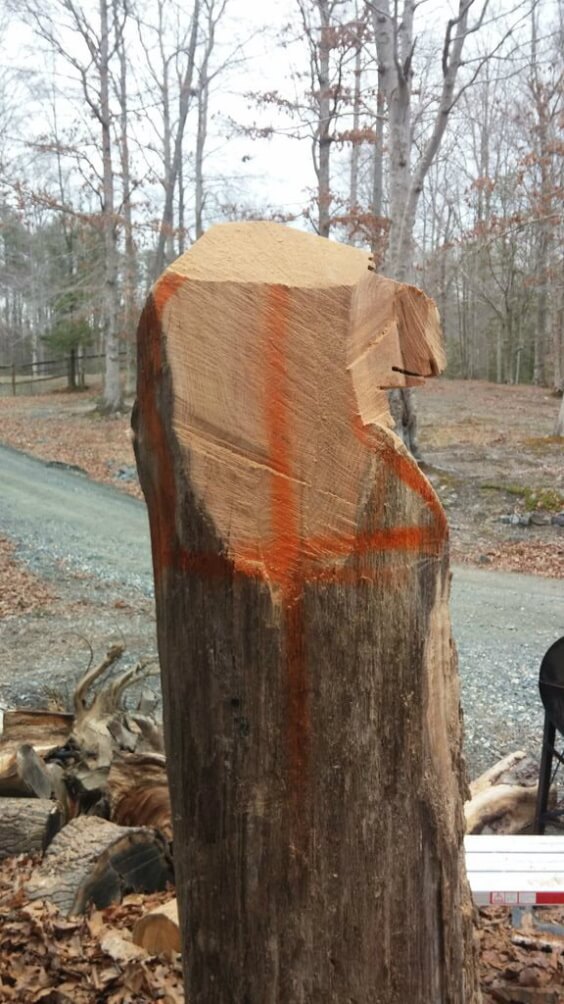
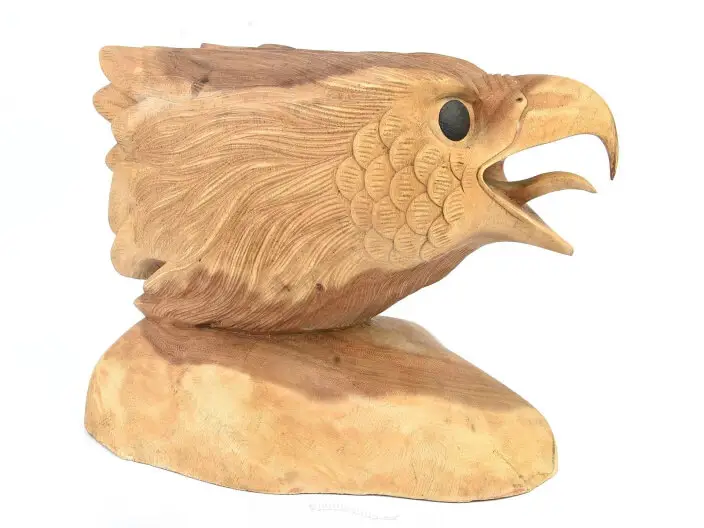
Making an eagle head using a chain saw is very popular among Americans. It is easy, fast and a simple design to begin your very first chainsaw sculpting.
The possibility of mistakes is very low. In the meanwhile, the eagle head only needs detailing on the beak and eye to make it identical, just like an actual eagle head.
Besides, the eagle has rough feathers all around its head and body. So, a few rough strokes won’t ruin the work.
For all these reasons, I really insist on carving an eagle head as a chainsaw sculpture for beginners. Professionals already know how to do any chainsaw sculpture, but beginners will be amazed at how it can look unimaginably artistic. The finished result will not look like a beginner’s work, I can bet!
Chainsaw Carving Eagle Step by Step

First of all, the wood stock has to be stationary. I prefer starting with a small to medium wood stock. For beginners, it will be easier to work with. Keep your wood stock nailed to a base if it is one ft long. Or make it stable using a lever and rope if it is a bigger piece.
Tools Used
To create the eagle head, we used a chain saw, finger sander, burring tool, rotary tool, blow torch, sanding paper, oak wood stock, pencil, and so on.
These are the basic tools used for this carving. No brand name is promoted here as depending on the usability, you can use the similar category tools you already own.
1. Drawing on the Wood Stock
Drawing an eagle template on a large, uneven surface can be difficult. But it can be done using just a pencil and a pattern you already have. Just make grids on the pattern and copy it to the wood stock.
If you have scored a 3×3 or 5×5 grid on the eagle head pattern, then take measurement of your wood stock and make the same grid on it. Now, just copy the lines you have on the pattern that falls in each grid line. It is like copying a map we did in school assignments. As simple as that!
The final result should be a rough drawing of an eagle head on the wood stock. If not the same, it should be close enough to the pattern you followed.
2. Material Removing
Now, here comes the work of a chainsaw. Power up the saw and use the sides of the saw to cut up extra woods that fall out of the line of the eagle head. Removing material from top and sides and easy.
Take caution while cutting woods under and around the beak of the eagle. The beak is the most identifiable part of an eagle, so, you won’t want to ruin it by over carving it. Remember, it is easy to cut off parts of your workpiece, but hard to put it back.
3. Making Feather Strokes
The second step was the tricky part. If you have passed it well, then you already have the basic shape of an eagle head. Now it is time to add details to it. The more detailed it would be, the more artistic and pro it will look.
To make feathers, just use the tip of the chain saw and carefully make slightly carved marks on the head. The marks should be small at the top and gradually it has to be a bit bigger as you keep making strokes downward. Just like the feathers of an eagle is short on the top part, and slightly bigger at the neck.
All the strokes should be in a downward direction and to the same angle. Different strokes of the feather will make it look haphazard. Carve lines on the sides of the beak as an opening of the mouth and breathing holes on the sides of the beak using the tip of the saw.
Don’t forget to add details to the base of the wood stock. No matter how aesthetic the head you make, if the base is undone, the overall impression of your work will not be well appreciated. So, while adding the details, once you are done with the upper part, turn your workpiece upside down and add detail to the base of the stock.

4. Sanding or Polishing Beak
Now you can ditch the chain saw as its work has finished. It’s time to pay attention to the beak of the eagle. It is the smoothest part of an eagle. So, it requires extra care to polish it.
You can use sandpaper to round off the beak or a rotary tool. The choice is yours. Here, a Makita finger sander tool is used, but you can use whatever you have in your toolbox.
5. Detailing Eye
I recommend doing this part after a break. Take a day off and apply wood conditioner to your workpiece. It will retain moisture in the wood. The reason for doing this detail after a break is, it requires patience and time.
You have to make a piercing eye. If the eyes are not piercing enough, then it is not an eagle at all. The sharp eyes are the second most identical part of an eagle. Now, all you need to do is make the eye deep and intense. Carving out the eyeballs and pupils is the key to make the eye stand out and detailed.
Use a rotary cutter or a drill to do this part. Using a small machine like a rotary tool will be easier to add details in such small parts as eyes.
6. Burn the Imperfections
Practically, your eagle head carving is ready. You can skip these parts but I promised an incredible art piece. So, here is how to achieve it with your plain-looking eagle head.
Use a blow torch and burn out the outer surface of the eagle head. Do it from a 10 to 15 inches distance. The flame should be low enough to make black stains on the wood stock and burn out the roughness of the eagle feather which was left undone.

7. Burr Out the Head
Now use a burring tool and clean up the black dust a little. The upper head up to the neck of an eagle is white. So, use the burring tool to make those parts lighter in color than the lower part. This will make your eagle look outstanding!
You can also choose to skip this burning and burring part and simply use a stain or varnish on the eagle. Leaving the sculpture bare is also a good idea. It is praiseworthy in all forms.
Bottom Line
Are these steps of wood carving seem overwhelming, complicated, or way too much? Trust me, it takes only an hour to do all the steps. When you are a pro, you will need minutes to carve out a sculpture out of wood.
However, there is a video attached below which shows how to make an eagle head following the steps I have mentioned here. If you don’t have so many power tools showed here, then it’s okay. You can use other manual alternatives and still make a beautiful eagle head.
Relevant Resources:
- How to Carve a Bear With a Chainsaw
- 10 Best Wood Carving Tools
- 12 Amazing Gift Ideas for People Who Love Carving
- Chainsaw Bars: for Smoothest Work
About This Writer

Hi, I am Eric Devin and I am a professional interior architect. Since childhood, I've always enjoyed DIY projects! And, I have loved to solve simple household problems using essential tools and equipment. I have also acquired a lot of information about basic household tools settings by working with contractors.