Carving figurines is a part of master carving skills for beginners. If you are bored making wooden spoons, spatulas, bowls, and spoon holders, then it is high time to work on figurines. As we all love dogs, carving a dog will be memorable, satisfactory and a piece to give someone or decorate a countertop.

Carving techniques for carving tools and power tools are totally different. As both of these ways are used nowadays, we have covered both. So, here, you will have step by step guidelines for manual and power carving a dog figurine.
How to Manually Carve Dog
To begin carving, the least expensive option is to use what you already have. Manual wood carving only requires a knife, and sanding paper. These two are more than enough to start this hobby and even turn it into beautiful work. So, first, we are sharing the steps that you can follow to carve a dog out of wood using over the counter tools.
The materials needed for this projects are:
- Block of wood basswood (1 x 2 x 2.5 inch)
- Pencil
- Pattern
- Whittling knife
- Detailed knife
- Safety gloves-level 5
- Thumb guard
- and a Coping saw
Draw the Shape
First, you have to choose a pattern to draw on the woodblock. There are countless amazing dog patterns on Pinterest and other platforms which are quite tempting. But I will tell you to brace yourself and choose a basic, simple pattern to start your first figuring. It will be easier to work with and can be made look artistic with added detail.
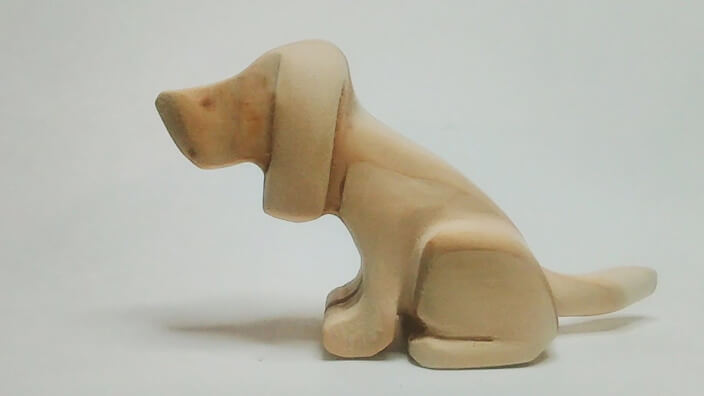
Take an easy dog pattern with a standing or sitting motion. A sitting dog has fewer details and is easier to carve out. However, print the pattern in a 2-inch size. A small carving project is preferable for beginners.
Cut Out the Shape
Now, draw the pattern on your woodblock using a pencil. You can copy the pattern using carbon paper or choose to draw it freehand. I prefer doing it freehand for a specific reason. To draw a freehand dog on a woodblock, first, make grids on the block. Take the longer 2 surfaces and make 3×3 grids.
Now take the narrow sides and make two long strips on both sides. One stripe will be the spine and another one will help to position the nose.

Cut Out Extra With Knife
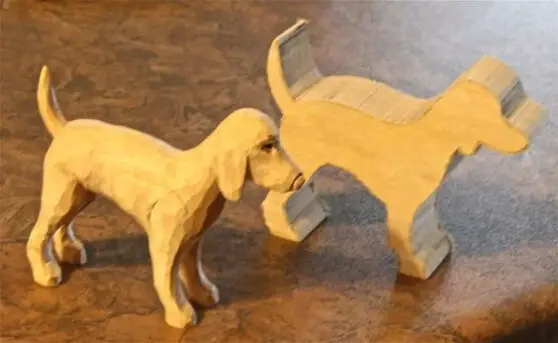
As the shape of the dog is ready, now it is time to cut out the silhouette. Simply use a coping saw and cut off the extra parts of the woodblock. It is also done with a whittling knife, but a coping saw is easier for beginners.
Start Whittling
Now, your project is ready for whittling. Take a small knife and cut along the sides of the outer parts of a dog. No matter the dog is sitting or standing, the legs, bum, tail, nose, and ears are the outer parts of the dog. Simply make stop cuts all around these parts and make push cuts and pull cuts to shave off woods around it. This way, these limbs will start standing out.
While doing so, keep drawing details of the dog as it will help to keep symmetry and alignment of the figurine. Once the outer parts are done, now you have a basic shape of a dog which also looks mostly like a dog. Now it is time to carve out the inner parts. If it is a standing dig, then large push cuts will be needed to shape up the tummy and in between the legs. For a sitting dog, only small push cuts are enough.
Do not hurry or don’t take large chunks at once. Instead, keep shaving small parts at a time and let the parts of this dog surface slowly. While doing the face, nose, mouth, and ears need extra caution because these are the smallest but most detailed parts of a dog.
Sand Down
When the basic whittling is done, your wooden dog is ready for sanding. Basically, when the whittling is done, your wood carving is also finished at this point. Your work will be considered complete even if you don’t want to work on finer detail on it.
But if you do, then take a sine grit sandpaper and start smoothing out the rough edges, cut and scratch marks of the knife. Don’t sand too much on the stop cuts which are done on the feet, around ears, and other tricky areas. These areas are identical to a dog figurine. If these are blurred, the figurine will not look finished anymore.
Add Detail
When the dog is all smoothed out, you can add detail like use a detail knife to add hair, whiskers, add detail to the eyes and feet, and so on. The dog will look more realistic with the details.
Varnish or Paint
You can leave the dog as it is or finish off by applying varnish, tint or paint. You can paint the eyes black and white, and leave the rest bare. Or you can color the dog collar and make the wooden dog stand out.

How to Carve Dog Using Power Tools
Using power tools is fast and easier than doing wood carving manually. These tools are used not for a leisure or hobby purpose, but more of a bulk production purpose. If you have the following tools and accessories, you are all ready to carve a dog using power tools now.
Tools Needed:
- Scroll saw
- Sanding paper
- Pencil
- Paper
- Template
- Packing tape
- Wooden block
- Sanding drum ( different sizes)
- Rotary tool
- High-speed cutter
- Diamond bit ( conical, round point, and long point)
Draw and Cut Out the Template
Just like manually carving a dog out of wood, using power tools also requires drawing and shaping the woodblock. For this purpose, there is no need to draw the dog on the wood. Instead, cut the shape out of paper and paste it on the woodblock using clear tapes.
Now it is good enough for cutting using a scroll saw without drawing. Try to cut the dog closer to the lines, not entirely on the lines. As the extra parts will be used for detailing.
Use Drum Sander for Material Removing
Once the shape is done, your dog is ready to shade some weight. Use your rotary tool with a large drum sander. This aggressive attachment will remove a lot of material fast. Don’t overdo it, only use it on parts where the dog needs some shaving. For example, the areas around the legs and ears and so on.
Likewise, use a smaller drum sander attachment with the rotary tool for more detail. Use it to make curvature on the ears, around the face, near the feet, and so on. Use small strokes for perfect results free of flaws.
Using Cutter for Outlining
Now, you need a cutter to cut the outer parts off from the dog’s body. The ears and legs are separate from the body. So, use the cutter to lines where you want to mark the folds of legs, tails, and ears. Use this cutter carefully as it can cut more than you actually like and the work will not be as expected anymore.
Diamond Bits for Detailing
Diamonds bits are available in different shapes and sizes. All are used for smoothing lines and surfaces. The long, pointed ones are best for smoothing out the rough cuts you have made with the cutter. So, use it first on the deep cuts. Then use the conical shape to smooth out the edges of the folds and cuts. For example, around the folded legs of a sitting dog or around the mouth.
Finally, the round point diamond bit is needed to smooth out larger surfaces where any rough cut is left out. You can use diamond bits as much as you like. Because you can’t overdo detailing your workpiece.
Sanding
Your carved dog is ready. You can work on it further and use sandpaper manually to smooth it out all over, but it is optional.
Conclusion
So, this is how you carve a dog manually and using power tools. I have shared the simplest techniques with you so that you can do it without making a mistake.
To begin wood carving, all you need is enthusiasm, patience, and necessary tools. It does not need masterclasses to actually master this skill. The steps described here will work on any figurine you want to make with wood. For larger projects, larger carving tools will be necessary.
Relevant Resources:
- How to Carve a Bear With a Chainsaw
- 7 Easy Steps for Chainsaw Carving an Eagle Head
- 10 Simple Things to Carve From Wood Any Beginners
About This Writer

Hi, I am Eric Devin and I am a professional interior architect. Since childhood, I've always enjoyed DIY projects! And, I have loved to solve simple household problems using essential tools and equipment. I have also acquired a lot of information about basic household tools settings by working with contractors.